Shortbread Cookies & Limoncello Icing

Happy New Year! The holidays have been pretty disruptive to my schedule, but in a good way. There’s friends and family to catch up with and warm weather to bask in when I go back to California. Now that I’m back in Chicago and bracing myself against 3° temperatures, it’s time to get back on track. I know January is all about focusing on resolutions to eat healthier, but what about embracing moderation– having your dessert and enjoying it too? Extremes are no fun. So, whenever I go to a potluck or bring goodies to friends, I always indulge and make something on the sweeter side.

For this year’s festivities, I made plain shortbread cookies and coated them with a zesty limoncello icing to amp up their tastiness (actual lemon zest optional). In the process, I learned that the “short” in shortbread does not refer to size but rather structure– in “short” baked goods, there is a large amount of fat in the dough, making it quite rich and giving the baked good a crumbly, melt-in-your-mouth texture. My original inspiration for making these cookies came from here. I added more sugar, but if you want a plainer cookie, use the half cup sugar instead of three-fourths cup sugar for two cups of flour.

Prep: 10 minutes
Cook: 12-14 minutes
Yield: about seventy 2×3/4 half inch pieces

Ingredients

For the cookies:

  • 1 cup butter, softened
  • 3/4 cup granulated white sugar
  • 1 1/2 tsp vanilla extract
  • 2 cups flour

For the icing:

  • 1 cup powdered sugar
  • 3 tsp limoncello
  • 2 tsp lemon juice

Instructions

  1. Cream butter and sugar. Stir in vanilla, then flour, adding in one half cup at a time. The dough will be very sandy! Don’t fret, when the butter melts in the oven, the dough comes together to form a non-sandy cookie.
  2. Preheat the oven to 350°F.
  3. As the oven is preheating, line a baking sheet with parchment paper. Mold the dough so it lies as a flat rectangle with a half-inch thickness.Before.png
  4. Bake the cookie dough for about 12 minutes, or until lightly browned on the edges.
  5. After the dough is out and left to cool for a few minutes, cut the dough into small (or however large you want them) rectangles.
  6. For the icing, first combine the limoncello and lemon juice.
  7. Slowly beat in the powdered sugar to create a smooth consistency.
  8. Spoon half a teaspoon’s worth of icing onto each cookie. Once that dries, spoon on a second layer.


Beer Bread

This is another magical recipe in my opinion. It’s the simplest thing to make and comes out very well, even if you use a cheap beer. There is no yeast you need to activate, no special kneading technique employed, and the recipe has a total of six easy-to-find ingredients on the list (if you’re 21 or older, that is). After a friend tried it at a party, he drizzled olive oil, balsamic, and herbs in a dish, and with our combined efforts it made a great party snack! All of the recipes online looked pretty similar, but I went with this one and used the commentators’ suggestions for improvement. The original calls for double the amount of butter and sugar, but using those measurements would have made it oddly sweet and too greasy. It is a bit dense, so remember to sift the flour beforehand so it’s not too tough! If you don’t have a fancy sifter, spooning it into the bowl works.

Prep: 5 minutes
Cook: 50-55 minutes
Yield: one 9×5 inch loaf of bread

Ingredients

  • 3 cups flour
  • 3 tsp baking powder
  • 1 1/2 tsp salt
  • 2 tbsp sugar
  • 12 oz (standard can or bottle size) of beer; a cheap, light beer or cider recommended
  • 1/4 cup butter

Instructions

  1. Preheat oven to 375°F
  2. Whisk together flour, baking powder, salt, and sugar.
  3. Add the beer and mix with a spatula until just combined.
  4. Transfer the dough to a lightly greased loaf pan and pour melted butter over it, making sure to get in the crevices.
  5. Bake for 50-55 minutes, and let cool for about 10 minutes once out of the oven.

Apple Strawberry Oat Bars

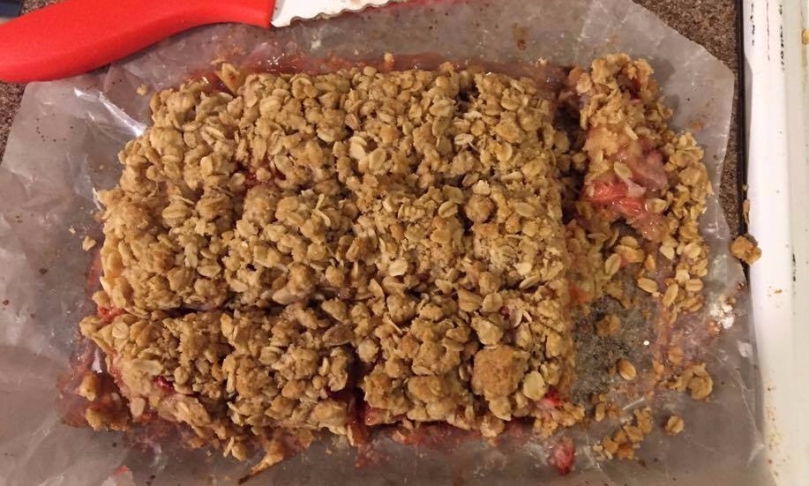
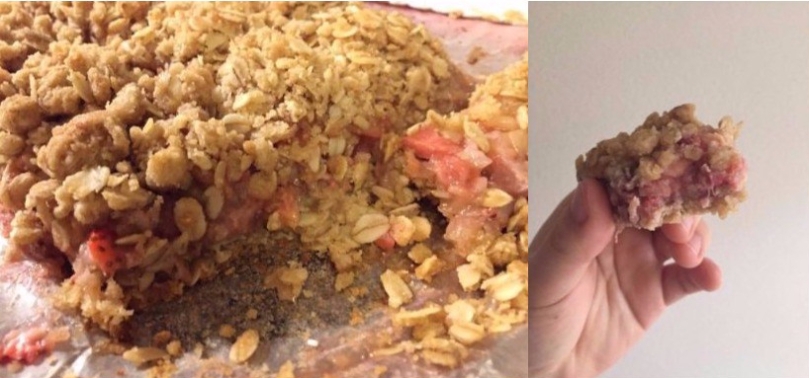
Stress baking usually happens when I have an overabundance of an ingredient on the verge of going bad, therefore making me more stressed knowing that it needs to be used in the next few days (or less!). My current dilemma was that I hadn’t polished off all my Jonagolds procured from apple picking a few weeks ago and that there were two cartons of strawberries that needed to either be eaten or remade into something else just as tasty. So, what else was there to do but combine them as a baked good? I looked to see what else I had around– of course there was flour and sugar in the pantry, but with oats, I instantly thought of fruit bars. No, not the kind you would want to consume on a long hike, but more of a dessert bar thanks to of all the butter that’s used. And that butter is worth it–these are so good! I couldn’t stop eating them, and needed to give them away to friends as soon as I could. It was this recipe that got me started. In my version, the crust was a lot thicker on top but it might have been because I used a smaller pan– what I did was take a circular 9×9-inch pan and pack the mixture into a 9×5-inch rectangle using wax paper. I also used more apple than strawberry, changing the ratios. And a sprinkle of cinnamon made things just right!

Prep: 15 minutes
Cook: 40 minutes
Yield: 12-15 bars, depending on bar size

Ingredients

  • 1 cup rolled oats
  • 3/4 cup flour
  • 1/2 cup brown sugar
  • 1/4 tsp salt
  • 7 tbsp butter
  • 1 cup finely diced apple
  • 1/2 cup finely diced strawberries
  • 1/4 tsp cinnamon
  • 1/2 tbsp cornstarch
  • 1/2 tbsp sugar
  • 1 tbsp lemon juice

Instructions

  1. Melt butter. Combine rolled oats, flour, brown sugar, and salt.
  2. Pour melted butter over oats and flour and incorporate until everything is well mixed.
  3. In a separate bowl, combine apple and strawberries and lightly mash to incorporate the two.
  4. Layer a pan with wax paper. In the prepared pan (I used 9×5 measurements), pack in half of the oat mixture. Add the apples and strawberries next, then sprinkle the cinnamon, sugar, cornstarch, and lemon juice over it.
  5. Top with the remaining oat mixture, and pat everything down to make sure it will stick together.
  6. Bake for 40 minutes, making sure the top is lightly browned. Once out of the oven, let cool completely before cutting into bars. If it seems to be falling apart, leave in the fridge for at least an hour to firm things up.
collage-2017-10-21
fruity oat goodness!

Plantain Muffins

I have never eaten plantains other than fried and prepared as a side dish in Cuban restaurants. I have never cooked or baked with one either. However, when I happened upon some in the dumpster behind a local grocery store, I had to take them and see what I could use them for. Even though plantains are comparable to bananas in appearance, their tastes are completely different when eaten straight from the peel. I bit into one, not knowing what to expect, and it reminded me of how the white part of a pomegranate smells. Texture-wise, it’s starchier. I didn’t know what to do with my formerly trashed plantains, but thought they could be incorporated into baked goods similar to bananas, still not understanding that they are completely different fruits. I made a few tweaks to this recipe, adding cinnamon and nutmeg, increasing the baking soda and baking powder, and omitting any crumb topping. It initially came out tasting more fruity yet savory than a muffin made with a banana would taste, but I liked it and wanted to share.

Prep: 5 minutes
Cook: 15-20 minutes
Yield: 20 muffins

Ingredients

  • 3 overripe plantains
  • 1/3 cup vegetable oil
  • 1/2 cup white sugar
  • 1/4 cup brown sugar
  • 1 egg
  • 1 1/2 cups flour
  • 1 1/2 tsp baking soda
  • 1 1/2 tsp baking powder
  • 1/2 tsp nutmeg
  • 1/2 tsp cinnamon
  • 1/2 tsp salt

Instructions

  1. Line a muffin pan with wrappers or grease lightly to prevent sticking.
  2. Mash plantains. Add vegetable oil, white and brown sugar, and egg. Mix until everything is well-combined.
  3. In a separate bowl, combine flour, baking soda, baking powder, nutmeg, cinnamon, and salt.
  4. Fold flour mixture into plantain mixture until it is just combined.
  5. Preheat oven to 375°F.
  6. Spoon batter into the muffin pan so it fills 2/3 of each cup.
  7. Bake for 15-20 minutes, or until edges are lightly browned and an inserted knife or toothpick comes out clean.
22627491_1495920753849200_1794763519_n
Fluffy and moist!

Flax Egg Banana Bread

When life gives you overripe bananas, you make banana bread. But have you ever faced the mild dilemma of having bananas at peak mushiness and not having any eggs in the kitchen? And you don’t feel like going to the grocery store? Well, if you have flax lying around, you can stay in and worry about picking up those eggs another day. All you do is whisk ground flaxseed and water together, let it sit for a few minutes until it becomes a bit gelatinous-looking, and then it’s completely usable for all your baking needs. It seems that some people heat the mixture up, which might give it more of a runny egg-like consistency, but I’ve never done that step and my baked goods have turned out fine. This is one step closer to making it a vegan-friendly bread– the next steps would be to substitute the butter and make sure the chocolate chips are vegan as well. (Also I know this is my second out of seven recipes that focuses on replacing eggs but I love eggs! I eat them all the time so I run out and then need to find other things that can act as substitutes.)

This is one of the easiest quick breads to make and also has a high approval rate amongst friends and family. I love banana bread and grew up eating homemade loaves thanks to my mom. We would always have a few overripe bananas lying around, and that was her go-to solution since we didn’t want to just throw them out. Sometimes she would add walnuts, or chocolate chips, or both, and then throw powdered sugar over the loaf once it was out of the oven and ready to be eaten. The recipes that inspired me for this one come from here and here.

Prep: 20 mins
Cook: 60 mins
Yield: one 9×5 inch loaf of bread

Ingredients

Wet

  • 2 tbsp ground flaxseed
  • 5 tbsp water
  • 3-4 bananas (more bananas will yield a moister bread)
  • 1/2 cup butter
  • 1 cup granulated sugar
  • 1 tsp vanilla

Dry

  • 1 1/2 cups flour
  • 1 tsp baking soda
  • 1/2 tsp cinnamon
  • 1/4 tsp salt
  • 2/3+ cup chocolate chips

Instructions

  1. Combine water and ground flaxseed. While waiting for it to settle, mash the bananas.
  2. Beat together butter and sugar until light and fluffy.
  3. Add the mashed bananas, vanilla, and flax egg to the creamed butter and sugar and mix well.
  4. In a separate bowl, combine the flour, baking soda, salt, and cinnamon until the mixture is uniform.
  5. Preheat the oven to 350ºF.
  6. Fold the flour mixture into the wet ingredients, being careful to not over-mix things.
  7. Fold in the chocolate chips. Save a few to decorate the top, if desired.
  8. Pour the batter into a greased 9×5 inch loaf pan and bake for an hour. You can insert a small knife or toothpick to check that the center is done by seeing if it comes out clean.

For a bit of extra decadence, feel free to top a slice with powdered sugar once the bread has cooled.

Oatmeal Chocolate Chip Cookies

I have been baking so much lately, for better or worse in this early fall heat resurgence. The only pro I can think of when it comes to baking on hot days is that it takes little-to-no time for butter to become “room temperature” if you spontaneously want to make something that involves it. Not that I would ever hold off on baking if it’s too hot outside, but I especially wanted to one recent evening because I was going to a housewarming and wanted to make something for friends there to enjoy. These cookies are inspired by Anne Burrell’s recipe  but I decided to not use nuts since they were going to a crowd. I love putting cinnamon in plain chocolate chip cookies because it really gives an extra dimension to the flavor. These were no exception, and I was happy to see it as an ingredient in her recipe.

My one tip is that when putting the cookie dough on the sheets, try to avoid having chocolate chips at the bottom of the dough ball. Trying to scrape off melted chocolate from a cookie sheet is no fun, and then I always think about the chocolate that was lost as a result, even if it’s one chocolate chip!

Prep: 15 minutes
Cook: 15 minutes
Yield: 36-40 cookies

Ingredients

Wet

  • 1 cup butter, room temperature
  • 3/4 brown sugar
  • 3/4 cup white sugar
  • 2 eggs
  • 1 tsp vanilla

Dry

  • 1 1/2 cups all-purpose flour
  • 1 1/2 cups rolled oats
  • 1 tsp baking powder
  • 1/2 tsp salt
  • 3/4 tsp cinnamon
  • 10 oz chocolate chips or chunks

Instructions

  1. In a large bowl, beat the butter and two kinds of sugar together until light and fluffy. Add the eggs and vanilla and mix well to combine.
  2. Leaving out the chocolate chips, add the dry ingredients together in another bowl and mix together until it appears uniform.
  3. Gradually add the dry mixture to the wet until everything is just incorporated. Use a spatula to fold in the chocolate chips.
  4. Preheat the oven to 350°F <- I’m putting this step in the middle/end of the prep process to save energy. In my experience, the oven will heat to the right temperature in time.
  5. On a greased cookie sheet, drop large tablespoonfuls of dough about an inch and a half apart from one another.
  6. Bake for about 12-15 minutes, or until the edges are lightly browned.
  7. Let them cool for a few minutes before trying to move them off the cookie sheets.

Chocolate Matzo Bark

I made this on a whim once–I like trying new things and had never made chocolate bark before, let alone on a matzo cracker. What I like about this combination is that the layer of matzo means that the chocolate bark is no longer overwhelming — as much as I love chocolate bark the confection’s thick pieces can at times feel like an inordinate mouthful of cocoa and sugar that I just don’t know how to process.

Like the soba salad, this is more of a recipe outline since there are so many different combinations of ingredients that can be used. All to your taste preferences! Instead of using semisweet chocolate, you could try milk chocolate, white chocolate, or even a combination of the two. How about dark chocolate smothered with salted caramel and topped with toasted almond slivers? White chocolate with chopped cashews and cherries and sprinkled with cinnamon? Those were examples off the top of my head that I may need to investigate later, but examples of the endless possibilities and balances of sweet and savory that would complement one another. How heavy or light you want to go on toppings is also up to you.

Prep and Assembly: 15 minutes
Cook: 15 minutes (to melt the chocolate)
Yield: 18-20 pieces

Ingredients

  • 6 matzo crackers (or more if there are leftover ingredients)
  • 10 oz semisweet chocolate chips
  • 1.5 tbsp butter
  • 1/3 cup pepitas (dark green pumpkin seeds), chopped
  • The peel of two oranges, minced
  • 2/3 cup orange-flavored cranberries, chopped (I found some at Trader Joe’s that were infused with orange flavor, but feel free to use the plain kind as well)

Instructions

  1. Put the chocolate and butter in a heat-safe bowl and place over a saucepan of hot water. Make sure this is a bowl that will fit snugly on top of the saucepan without gaps. As the butter and chocolate begin to melt, stir to make sure things are melting evenly and to develop a smooth consistency.
  2. Once the butter and chocolate chips are melted, turn the heat to low and begin spreading it on the matzo crackers with a spoon or spatula. Keep the chocolate on heat so it does not harden.
  3. Before the chocolate has set, sprinkle on the pepitas, orange peel, and cranberries. Push the toppings down if it looks like they will fall off.
  4. Refrigerate for a half hour or until they set, then break each cracker into several pieces. In order to retain as much of the chocolate and toppings as possible, I carefully chipped different sections off with a knife.
21767390_1466290633478879_1466502397_n
the finished product

What I liked most about this was the combination of beautiful jewel tones thanks to the cranberries and oranges with the dull jade of the pepita on a rich chocolate canvas.


Chocolate Zucchini Bread

I am a humongous fan of chocolate (and vegetables)! As I’m sure you could guess,  I am interested in pairing the two whenever I can just to get in my chocolate fix. Just because we conventionally cook zucchini for meals and eat them as savory foods this squash, like a carrot, is very sweet and seemingly underutilized as dessert. Grating it especially brings out its sweetness. I have only recently started to bake with zucchini but have been pleased with the results.

I visited my friend a few weekends ago in Detroit and wanted to make something to share with him and his family. As I was browsing Two Peas & Their Pod, I found this recipe that I definitely wanted to use. The chocolate zucchini bread I ended up with using their recipe (one of their most popular breads, according to their website) was moist and and flavorful, and something that I could see eaten as breakfast, a snack, or a “healthy-ish” dessert paired with milk.

Prep: 20 minutes
Cook: 50 minutes
Yield: one 9×5 inch loaf of bread

Ingredients:

  • 1/4 cup melted unsalted butter
  • 1/4 cup vegetable oil
  • 3/4 cup packed brown sugar
  • 2 room temperature eggs
  • 1 teaspoon vanilla extract
  • 1 cup flour
  • 1/2 cup cocoa powder
  • 1 teaspoon baking soda
  • 1/2 teaspoon sea salt
  • 1 1/2+ cups grated zucchini
  • 1+ cup chocolate chips

Instructions:

  1. Preheat oven to 350°F and grease a 9-by-5-inch loaf pan.
  2. Combine melted butter, oil, brown sugar, eggs, and vanilla extract in one bowl, making sure everything is evenly mixed.
  3. In another bowl, combine the flour, cocoa powder, baking soda, and sea salt.
  4. Pour the dry into the wet ingredients, but mix until just combined.
  5. Stir in the shredded zucchini until just combined, and then 3/4 cup chocolate chips.
  6. Pour batter into the greased loaf pan and use the reserved 1/4 cup of chocolate chips to top the bread as decoration.
  7. Bake for 50-60 minutes, or until an inserted toothpick comes out mostly clean.

Of course, you will want it to cool a little bit before removing the bread from the pan. Once it’s out, try topping a slice with some vanilla yogurt or cinnamon. Enjoy! 

Carrot Cake Cookies

Last week, I was looking for a recipe that could fulfill two requirements: something I could make with the abundance of carrots in my fridge and something that was easily portable so I could share with my friends– these cookies were the result. They’re less time-consuming to make than traditional carrot cake and maybe a bit healthier since they come in smaller portion sizes? These low-effort cookies had a high approval rating, which is a win-win in my book. (And the recipe was adapted from one published by Land O’Lakes a few years back.)

Prep: 20 minutes
Cook: 15 minutes
Yield: 20 cookies (and can definitely be doubled)

Ingredients

  • 1/2 cup softened unsalted butter
  • 1/2 cup brown sugar
  • 1/4 cup white sugar
  • 1 large egg
  • 1 teaspoon vanilla
  • 1 1/4 cups all-purpose flour
  • 1/2 teaspoon baking soda
  • 1+ teaspoons ground cinnamon
  • 1/4 teaspoon salt
  • 1+ cups (2 medium) grated carrots
  • 1/2 cup finely chopped nuts (optional) I used walnuts but almonds or pecans would work well too.

Instructions

  1. Preheat oven to 350°F.
  2. In one bowl combine flour, baking soda, cinnamon and salt.
  3. In a separate bowl, beat the butter, brown sugar, and white sugar together until the mixture is light and creamy.
  4. Add the egg and vanilla into the butter/sugar and mix until incorporated.
  5. Combine the contents of both bowls into one (doesn’t matter which) and once well-mixed, stir in the grated carrot and (optional) nuts of choice.
  6. Drop rounded tablespoonfuls of dough onto greased cookie sheets.
  7. Bake 12-15 minutes or until the edges are lightly browned.

And there you have it! Simple carrot cake cookies. Share with friends or enjoy as a midday pick-me-up.